GIT repository WordPress development strategy

In WordPress development, there are different strategies. Some WP programmers keep files locally and upload them using FTP. Let’s talk about a more convenient solution for creating a new WordPress site: keep files in the GIT repository, update site using git pull and apply WP CLI commands for maintenance.
WordPress GIT structure
We would like to keep only the necessary files and be able to update servers really fast (using the git pull command). Here is a simple solution for WordPress development using GIT. We store only themes and plugins in GIT. WordPress core files are not added.
wp-content/
├─ plugins/
├─ themes/
│ ├─ parent_theme/
│ ├─ child_theme/
.gitignore
Staging site setup
Having theme and plugin files pushed to GIT, we can focus on the staging server setup. We will use the automatic approach with git init and git pull. For WordPress core, we will use WP CLI commands. We already have the domain set up, the MYSQL database created, SSH access and we have installed the GIT library. We’re going to follow these steps to set up the WP site:
- Use WP CLI to create empty WP site
- Use Git init to fetch files from GIT
WP CLI
The WP-CLI command-line interface for WordPress enables the management of a WP installation from the SSH connection: to update plugins, change urls in the database, add users and much more. Nowadays WP-CLI is available on most shared hostings and can be used without any installation. There is also an option to install it from a PHAR file, more info: https://wp-cli.org/#installing
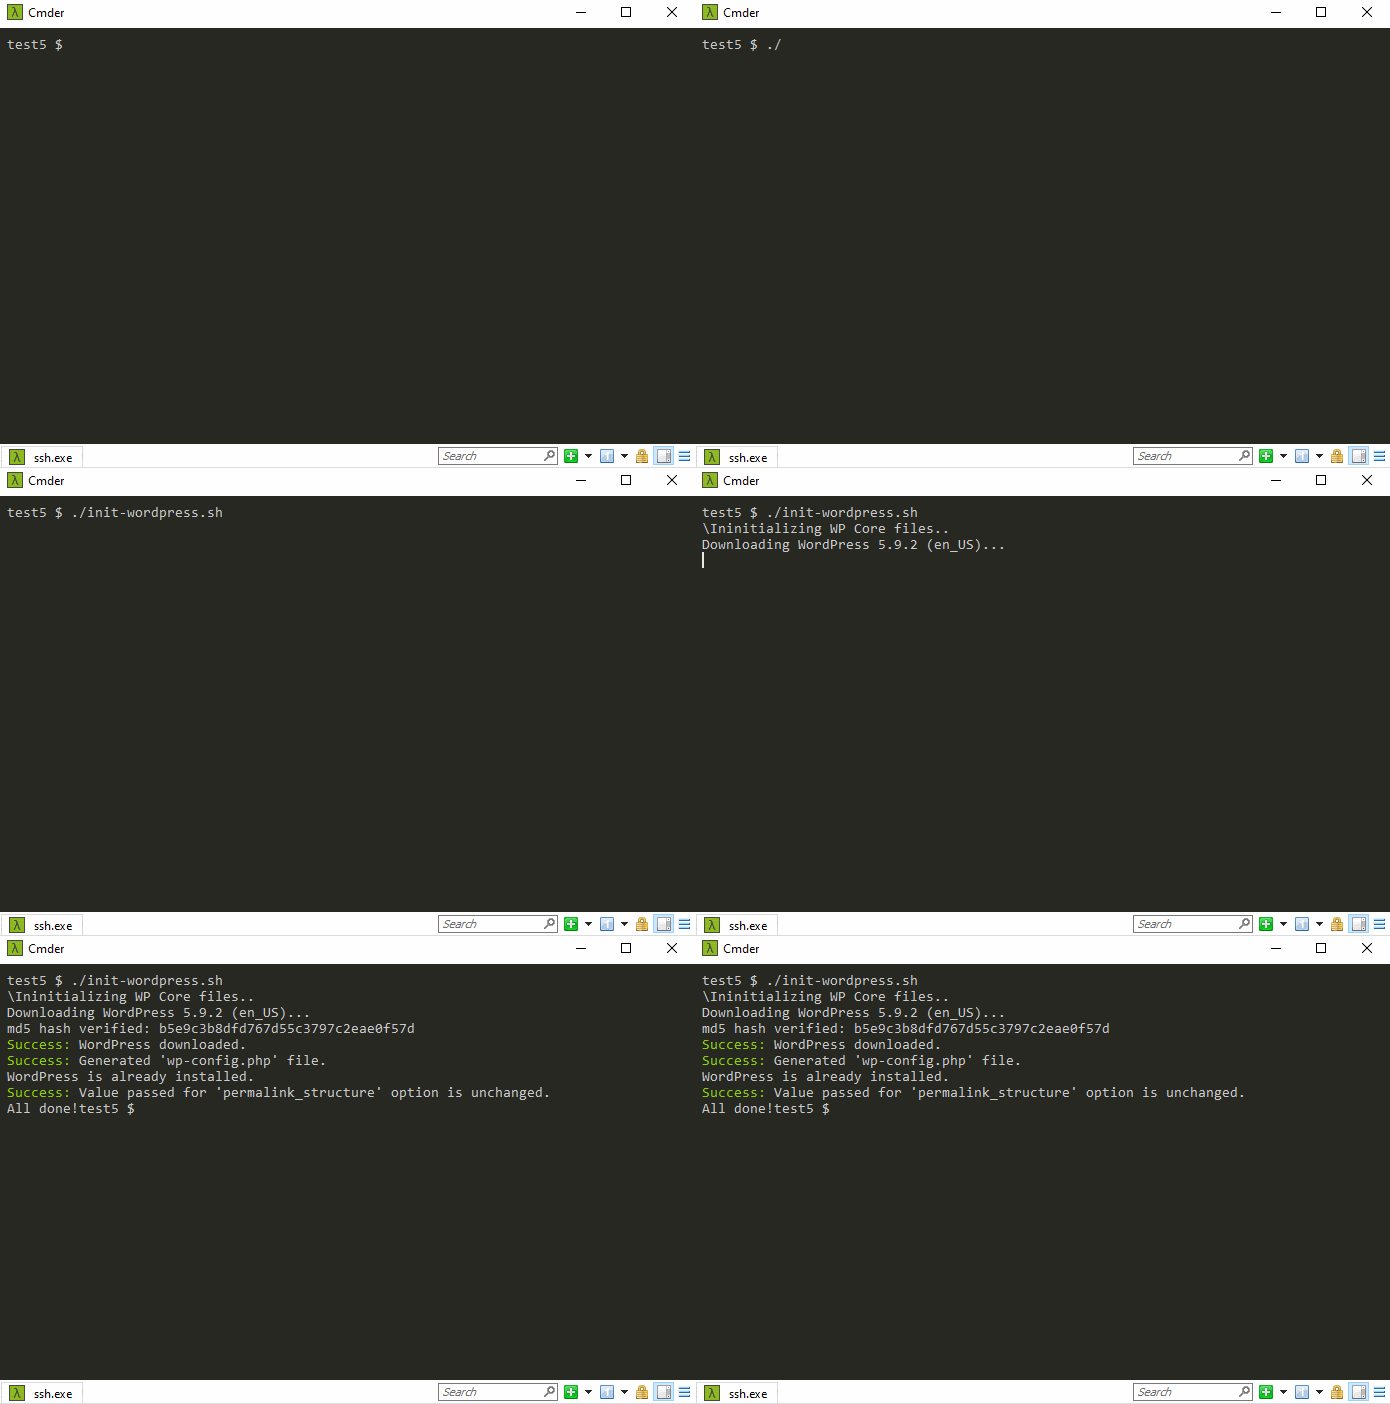
Here is a bash script that will download the newest core files, configure wp-config.php, install a new site, configure permalinks add create .htaccess.
#!/bin/bash
# init-wordpress.sh
WPHTACCESS_TEMPLATE=$(cat <<-END
# BEGIN WordPress
RewriteEngine On
RewriteRule .* - [E=HTTP_AUTHORIZATION:%{HTTP:Authorization}]
RewriteBase /
RewriteRule ^index\.php$ - [L]
RewriteCond %{REQUEST_FILENAME} !-f
RewriteCond %{REQUEST_FILENAME} !-d
RewriteRule . /index.php [L]
# END WordPress
END
)
DB_NAME="db001";
DB_USER="user001";
DB_PASS="abc";
DOMAIN="example.com"
WP_PASS="mypass1";
WP_LOGIN="admin123"
WP_MAIL="test@example.com"
printf "\Ininitializing WP Core files..\n"
wp core download
wp config create --dbname=$DB_NAME --dbuser=$DB_USER --dbpass=$DB_PASS
wp core install --url=$DOMAIN --title=Website --admin_user=$WP_LOGIN --admin_password=$WP_PASS --admin_email=$WP_MAIL
wp option update permalink_structure '/%postname%/'
# create htaccess
touch .htaccess
echo -e "$WPHTACCESS_TEMPLATE" >> .htaccess
echo -n "All done!";

GIT repository for WordPress initialization
Now, we’re going to init git repo. Using GIT commands, we will fetch the newest changes from the repository: themes and plugins. Our staging server directory is not empty (we have core files already), so instead of using git clone, we need to use git init. Here is an example solution:
# init GIT using SSH
git init
git remote add origin https://linktogitdomain.com/project1/wp001.git
git fetch
git checkout -t origin/master
git reset --hard HEAD
git pull
Updating website
Our website uses /wp-content/themes/child_theme/ as an active theme. To update the code or fix any bug, we should:
- Edit the code of /wp-content/themes/child_theme/ locally
- Commit + push changes to GIT
- Execute: git pull (on the staging server)
This strategy has a lot of benefits: we have a history of changes (GIT history), and staging server updates are very fast. Also, we are sure that code on staging and on GIT are the same ( the FTP Client sometimes fails to send all files to the server ).
Updating plugins with GIT
WordPress plugins need to be updated frequently. New versions often include security updates or new features, so it’s important to not forget about site maintenance. Here is the preferred approach when using GIT WP structure:
- update plugins locally, test if local site is working fine
- delete old plugins: commit and push
- add plugins in the newest version: commit and push
Perhaps you’re thinking – why delete old plugins, maybe it’s better to just overwrite the old files? The reason for deleting all old files is that a new plugin version could remove some files, and by overwriting them, we will keep unnecessary files. In addition, if a plugin is auto-loading all files from the directory automatically, we can have a situation when some PHP classes from the old version are initialized automatically on plugin init and that can result in incorrect plugin behavior or PHP errors.
Updating WordPress core using GIT
We can ask WP-CLI to update WordPress to the newest version. This can be achieved using the command:
# WP CLI command for fetching newest core files
wp core update
gitignore with WordPress
When creating a GIT repository, one of the first files created is .gitignore. It should be placed in the main directory. For WordPress development and PHPStorm as IDE, we recommend to just keep themes and plugins. Other things, like core files and uploads, should be kept on the server directly.
# -----------------------------------------------------------------
# .gitignore for WordPress
# Bare Minimum Git
# http://ironco.de/bare-minimum-git/
# ver 20150227
#
# This file is tailored for a WordPress project
# using the default directory structure
#
# This file specifies intentionally untracked files to ignore
# http://git-scm.com/docs/gitignore
#
# NOTES:
# The purpose of gitignore files is to ensure that certain files not
# tracked by Git remain untracked.
#
# To ignore uncommitted changes in a file that is already tracked,
# use `git update-index --assume-unchanged`.
#
# To stop tracking a file that is currently tracked,
# use `git rm --cached`
#
# Change Log:
# 20150227 Ignore hello.php plugin. props @damienfa
# 20150227 Change theme ignore to wildcard twenty*. props @Z33
# 20140606 Add .editorconfig as a tracked file
# 20140404 Ignore database, compiled, and packaged files
# 20140404 Header Information Updated
# 20140402 Initially Published
#
# -----------------------------------------------------------------
# ignore everything in the root except the "wp-content" directory.
/*
!wp-content/
# ignore all files starting with .
.*
# track this file .gitignore (i.e. do NOT ignore it)
!.gitignore
# track .editorconfig file (i.e. do NOT ignore it)
!.editorconfig
# track readme.md in the root (i.e. do NOT ignore it)
!readme.md
# ignore all files that start with ~
~*
# ignore OS generated files
ehthumbs.db
Thumbs.db
# ignore Editor files
*.sublime-project
*.sublime-workspace
*.komodoproject
# ignore log files and databases
*.log
*.sql
*.sqlite
# ignore compiled files
*.com
*.class
*.dll
*.exe
*.o
*.so
# ignore packaged files
*.7z
*.dmg
*.gz
*.iso
*.jar
*.rar
*.tar
*.zip
# ignore everything in the "wp-content" directory, except:
# "mu-plugins" directory
# "plugins" directory
# "themes" directory
wp-content/*
!wp-content/mu-plugins/
!wp-content/plugins/
!wp-content/themes/
!wp-content/languages/
wp-content/themes/index.php
# ignore these plugins
wp-content/plugins/hello.php
wp-content/plugins/index.php
# ignore specific themes
wp-content/themes/twenty*/
# ignore node/grunt dependency directories
node_modules/
# Created by .ignore support plugin (hsz.mobi)
### JetBrains template
# Covers JetBrains IDEs: IntelliJ, RubyMine, PhpStorm, AppCode, PyCharm
*.iml
## Directory-based project format:
.idea/
# if you remove the above rule, at least ignore the following:
# User-specific stuff:
# .idea/workspace.xml
# .idea/tasks.xml
# .idea/dictionaries
# Sensitive or high-churn files:
# .idea/dataSources.ids
# .idea/dataSources.xml
# .idea/sqlDataSources.xml
# .idea/dynamic.xml
# .idea/uiDesigner.xml
# Gradle:
# .idea/gradle.xml
# .idea/libraries
# Mongo Explorer plugin:
# .idea/mongoSettings.xml
## File-based project format:
*.ipr
*.iws
## Plugin-specific files:
# IntelliJ
/out/
# mpeltonen/sbt-idea plugin
.idea_modules/
# JIRA plugin
atlassian-ide-plugin.xml
# Crashlytics plugin (for Android Studio and IntelliJ)
com_crashlytics_export_strings.xml
crashlytics.properties
crashlytics-build.properties
How to backup the entire WordPress site
Here is the final tip, for creating a manual backup of the entire website. We will use the TAR library (similar to the zip compressing tool). It’s really fast and even sites measured in gigabytes will be zipped in seconds. The first step is to create a database backup, move it to wp-content directory and then zip wp-content directory to one file. The final file will be gzipped, which will ensure the smallest possible size.
Here are SSH commands for preparing a manual backup of a WordPress site:
# backup wordpress site using SSH
wp db export
mv db001-2022-03-24-huw344a.sql wp-content
cd wp-content
tar -zcvf ../wp-backup-2022-03-24.tar.gz .
# clean up
rm db001-2022-03-24-huw344a.sql
That’s it. Now, in the main directory, the wp-backup-2022-03-24.tar.gz file will contain all wp-content files and the .sql database dump.
To restore the backup, place the tar.gz file in the empty wp-content directory and execute:
# restore tar.gz backup
cd wp-content
tar -zxvf wp-backup-2022-03-24.tar.gz
# clean up
rm wp-backup-2022-03-24.tar.gz
That’s it for today’s tutorial. We hope you will understand the topic better and improve your WordPress – GIT workflow. Make sure to follow us for other tips and guidelines, and don’t forget to subscribe to our newsletter.


